These 5 essential Premiere Pro effects are a must know for every advanced editor. Take your edits to the next creative level. —Cinecom.net

All tagged Track Matte Key
These 5 essential Premiere Pro effects are a must know for every advanced editor. Take your edits to the next creative level. —Cinecom.net
In this tutorial I will show you a simple method to create a double exposure style video effect in adobe premiere pro cc 2017! —Justin Odisho
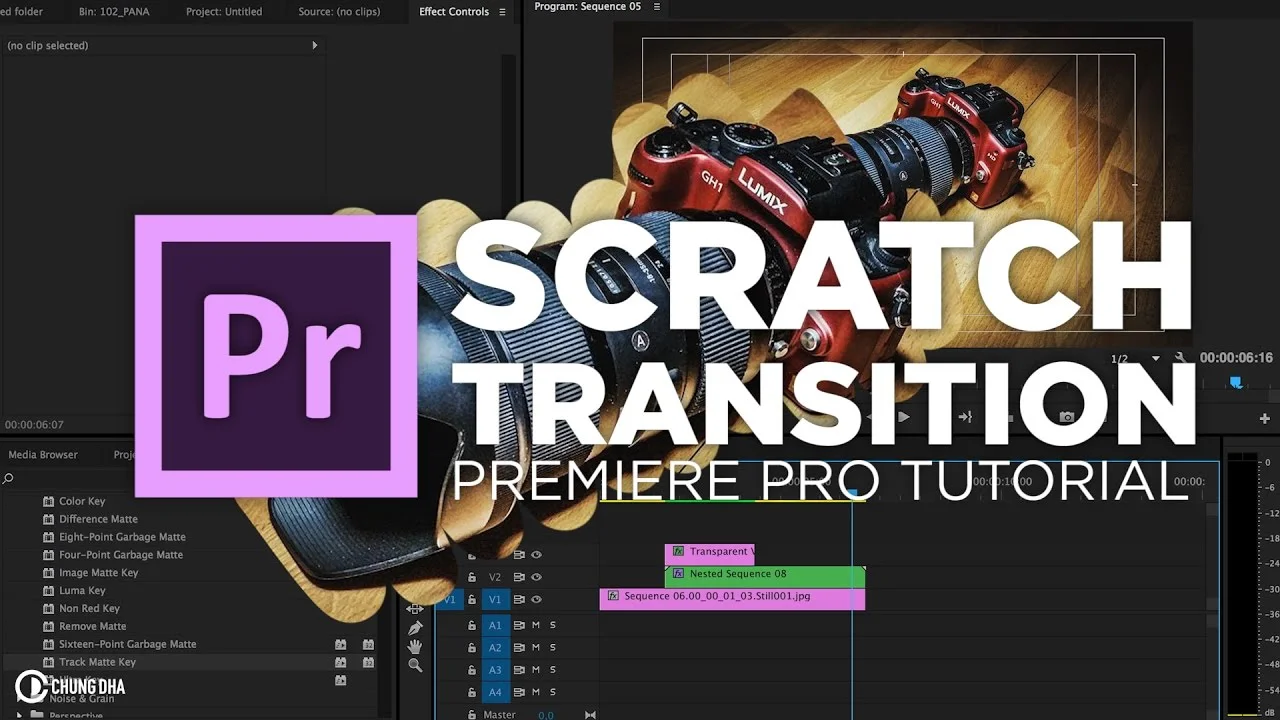
In this video tutorial I am going to show you how to use the write-on effect inside of Adobe Premiere Pro CC to make a Scratch Transition, where you scratch away a part of the screen to reveal the next shot and transition to the next shot. —Chung Dha
In this Premiere Pro tutorial, Ignace Aleya of Tolerated Cinematics shows how to reveal video through text. This technique (alpha matte and luma matte) applies to any black or white shapes.
In this Premiere Pro Video Editing tutorial, we will build a double masked animation transition to make a cool pop up spinning shape that will spin and burst outward to reveal the new video scene. You’re going to learn a bunch about the presets in Premiere, how to animate with keyframes, easing, masking video tracks, and much more! You’re going to love it! —tutvid
In this Tutorial video I am showing you in an easy method how to achieve the self-writing text effect inside of Adobe Premiere Pro, without needing to make a lot of titles and inside of Premiere Pro. There is no preset for this so just watch the video. —Chung Dha
Ever wonder how to make text "write-on" by itself? Did you know Premiere Pro has a Write-on effect? In this Premiere Pro tutorial, Chung Dha teaches how to animate the Write-on effect to reveal your text so it looks like it's writing on the screen.
First, create your text using the Title Designer in Premiere Pro. Script or handwritten fonts work particularly well with this technique. Then apply the Write-on effect to a Transparent Video clip above your text in the Timeline.
Next, Chung makes some preliminary changes to the stroke length at 1:41. But starting at 2:10 Chung begins keyframing the path of the stroke that will reveal the text. He uses keyframe bezier handles to finesse the path around the curves of the text.
The next step is critical. At 4:36, Chung increases the Brush Size so that it covers all the text. This is important because any text outside the stroke will be visible before the write-on animation.
Keyframing the path on the text is a time-consuming process that looks much faster when sped up in a tutorial. Power through! The reward of seeing your text write-on is well-worth it!
Now for the magic. At 5:49, Chung applies the Track Matte Key effect to the Title clip, and selects the track with the Transparent Video clip as a Matte. Now the Write-on stroke animation reveals the Title. Alternatively, the Write-on effect has it's own Reveal Original Image Paint Style which does the same thing as the Track Matte Key.
Learn how to use shapes and effects to create a reflection design for your videos. —Justin Odisho
Learn how to create a flowing Ink Drop Transition in this Adobe Premiere Pro CC 2017 Tutorial by combining stock footage and luma key blending modes for a unique result. —Justin Odisho
Learn how to create a unique handwritten text title in Adobe Premiere Pro CC 2017 with this tutorial. —Justin Odisho
Learn how to create handwritten text on your video in Premiere Pro. This is not a font—it's your actual handwriting! In this tutorial, Justin Odisho teaches how to capture your handwriting and composite it on your footage in Premiere Pro.
First, write your text with a black marker on a white piece of paper, as Justin demonstrates at 0:08. Then, take a picture of your text and import the photo into Premiere Pro. At 1:04 Justin cleans up with photo by drawing a mask around the text, eliminating all unwanted areas of the paper.
The next step is critical. At 1:29, Justin says to apply specific blend modes depending on what you want the final text to look like. Choose Multiply if want the text to remain black; choose Screen if you want to change the text to white. In either case, the blend mode is used to make the paper transparent and only the text visible.
In this example, Justin wants white text. So at 1:53 he shows how to invert the RGB curve (or luma curve) in the Lumetri Color panel; he sets the black point to white and the white point to black. This changes the black text to white, but still leaves some of the paper behind. Justin finesses the RGB curve into an S-shape which increases the contrast and eliminates the remaining paper.
Going further, Justin shows how to add a custom color to the handwritten text at 3:10. To do this, add a color matte under the text and apply the Track Matte Key effect to the text clip. Select the appropriate Matte track in the Effect Controls so the text reveals the color underneath it. From here you can nest the text and the color matte and apply transitions to your handwritten text.
In this video tutorial I am showing you how make a Transparent Text Box that is different from other Tutorials out there. As this does not require any extra layers or nesting and to make it even easier and faster workflow you can download presets to apply the effects. —Chung Dha
Learn how to create animated mattes or "style mattes" in Premiere Pro with this Make Better Video tutorial with VFX artist, Sean Mullen of Rampant Design. The great thing about Sean's tutorials is the real-world examples of the material he's teaching. This animated mattes tutorial is no different; the first 60 seconds is chock full of examples of real-world value. Animated mattes are basically moving shapes that reveal the footage beneath. Sean begins the tutorial in Premiere Pro by showing the limitations of simply cropping the footage. Instead, at 3:06 Sean says the better workflow is creating the matte on a separate track with a color matte. Once you've created your matte using the Crop effect (or a mask), apply the Track Matte to effect to the footage, not the matte, as shown at 4:14. But there's a trick, at 5:22 Sean shows why it's important to nest your footage before adding the Track Matte effect. This allows you to move your footage in the nested sequence independently of your matte. It's long tutorial! But Sean keeps your attention with tons of helpful tips and some humor sprinkled throughout.
VFX Artist Sean Mullen shows us how to create a animated mattes in Adobe Premiere Pro. Sean walks us through multiple methods of animating mattes, sometimes called track mattes or style mattes. —Make Better Video