Mask and Flash Effect in Premiere Pro
Highlight objects in your shot with the Mask and Flash effect in Premiere Pro.
Is there something in your shot that you visually want to call out to your audience? The "mask and flash" effect is a great solution for re-engaging your audience with what's going on in your video. In this tutorial featuring a video by Cooper Tyra of Tyra Films, you will learn how to draw a custom mask around an object and make it flash in Premiere Pro.
Via Tyra Films
This effect is very 'effective' at highlighting something important in your shot. It's a great way to emphasize a specific object to your audience and make your video look super dope. And you don't need After Effects! You can do it all in Premiere Pro using Opacity masks and the Invert Effect. Here's how...
Create a Mask Around an Object
1. Duplicate your clip above itself by holding Opt/Alt and dragging the clip to the next track
2. Select the top clip. In the Effect Controls panel click the free draw bezier tool (pen tool) under Opacity. This tool allows you to create a free-form shape mask
Select the Free Draw Bezier (pen) tool to create a free-form mask in the Program monitor.
3. dentify the object you want to mask in the Program monitor. Zoom in if you have to using the drop-down
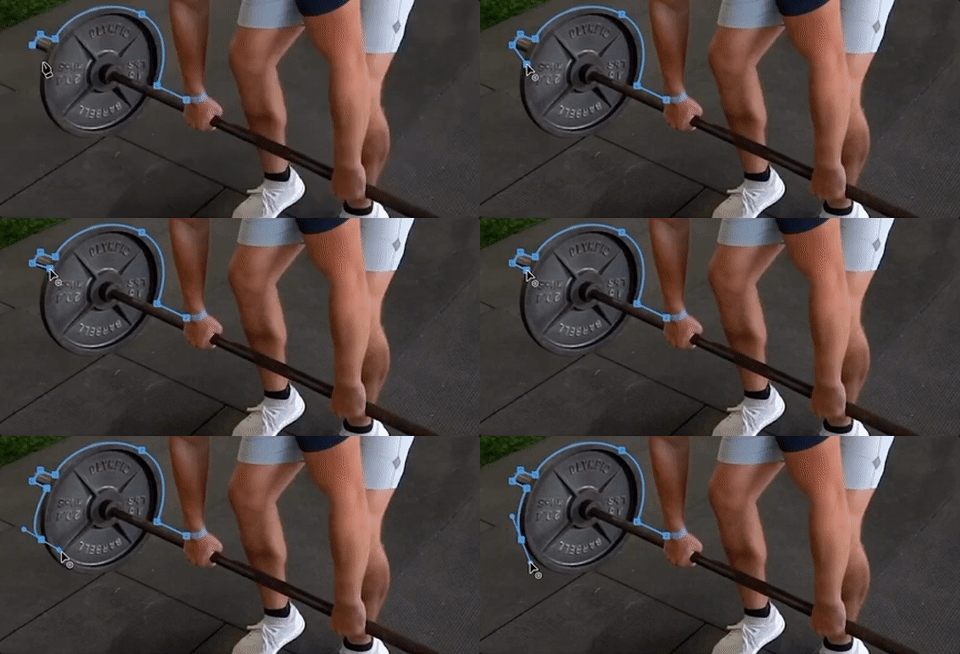
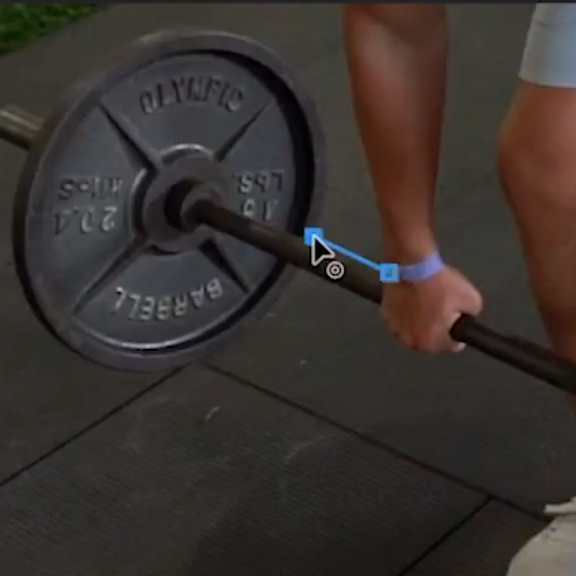
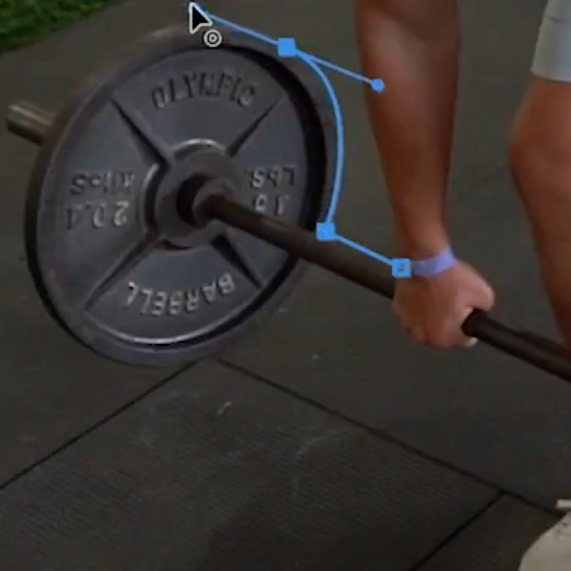
4. Click in the Program monitor to begin adding vertex points. Just clicking (not dragging) will create straight path segments. Clicking and then dragging will create a bezier (curve) path segment. (In the video, Cooper uses straight paths for the handle and a bezier path for the weights.) Adjust the curve of a bezier vertex by dragging on the blue handles. Hold Opt/Alt and drag to adjust each handle independently. Learn more about masking in Premiere Pro.
5. Close the mask by clicking on the original vertex. Create additional masks if necessary. (In the video, Cooper adds two more masks to avoid his hands on the weight.) The object is now masked out, everything outside the mask is transparent. (The reason nothing appears to change is the clip below is the exact same frame.)
6. Click the Mask Path animation stopwatch to set a keyframe. Move forward several frames and adjust the mask path to follow the object if necessary. Moving the path vertices will automatically create Mask Path keyframes
Toggle Mask Path animation to track your mask to the object.
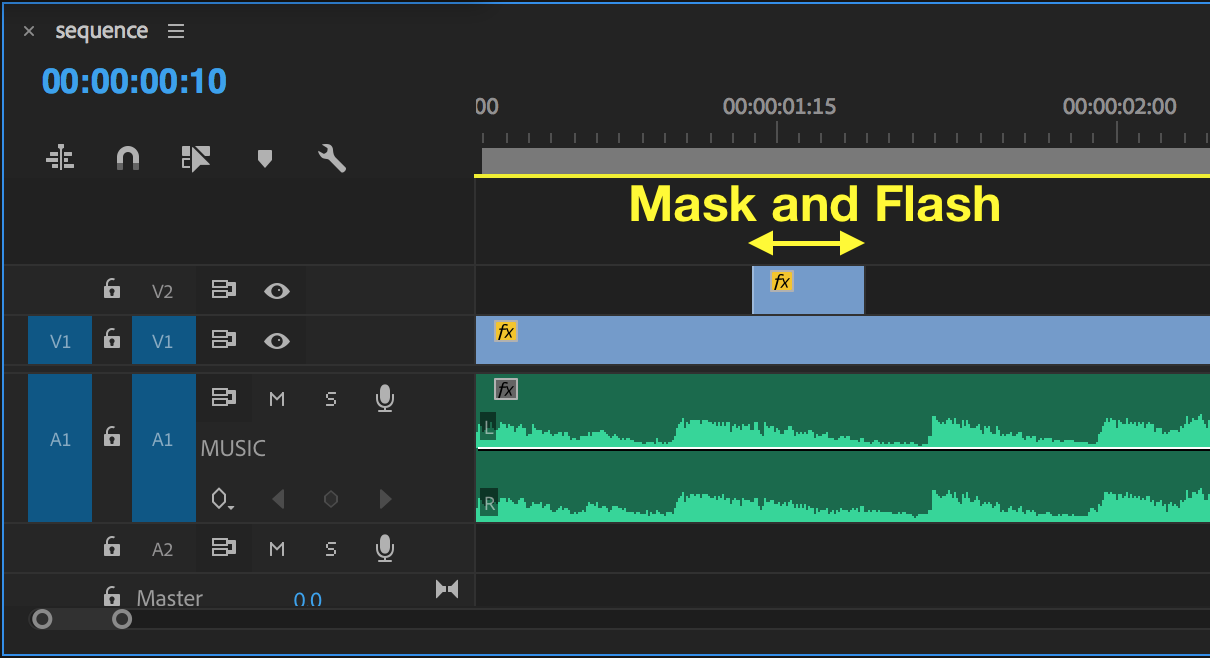
7. Trim the top clip to the length of your Mask Path. This will be the duration of your effect. Again, it only needs to be 2-3 frames
Trim the top clip with the Mask and Flash effect to your desired length. 2-3 frames is plenty.
PRO TIP: Adjust Mask Feather to blur the edges of the mask. Use this to give your flash a subtle glow.
Create the Flash Effect
Now that the object is masked out, it's time to make it flash! In the full tutorial, Cooper accidentally adds his masks to the bottom clip. At 6:28, he rearranges the layers so the masked clip is on top and trims the clip to the duration he wants the flash to be. In the video segment below, he creates the flash by adding the Invert effect to the top clip with the masks.
Apply the Invert effect to the top clip with the mask by dragging the effect from the Effects panel onto the clip
Customize the Invert effect to taste in the Effect Controls panel
This completes the Mask and Flash effect. But there's so much more you can do with it. Try it out and make it your own!
Bropinion
Obviously, this tutorial takes way too long to start. But once it does, it's really clever. The reason we think this tutorial deserves to be featured is it's so universally applicable. Literally, you can mask and flash anything in your shot to draw the viewer's focus. Or you could just use it to add some visual flair. The fact that it's only several frames long makes the Mask and Flash very easy to do, even if your particular object requires a complex mask shape.
How can you use the Mask and Flash effect to highlight objects in your videos? Can you share any specific examples? Let us know below!
Tyra Films
Cooper Tyra is a young filmmaker who wants to travel the world, inspiring and creating. Support him by subscribing to his YouTube channel and following him on Instagram.


